It pays to upgrade your home’s insulation—it makes it more energy-efficient, better for indoor air quality, and even adds value to your property. But first, you’ll need to undergo one important process: insulation removal. When properly done, this process ensures that the old or compromised material is removed safely and comprehensively. If you’re preparing for this upgrade, this is how to ready your home for a seamless and hassle-free insulation removal process.
Why Insulation Removal is Necessary
Over time, insulation can become inefficient or even hazardous. Whether it’s due to water damage, rodent infestation, age-related deterioration, or you’re simply switching to a better product like platinum spray foam, removing old insulation is the first essential step. Neglecting this can lead to poor air quality, high utility bills, and lingering allergens in your home.
Step 1: Hire a Reputable Insulation Removal Team
Before any prep work starts, it’s advisable to select a professional service that has experience with insulation removal. Find companies with certifications, good reviews, and field experience. A reliable provider will also be able to recommend the optimal new insulation products—such as platinum spray foam, which is renowned for its air sealing and energy efficiency capabilities.
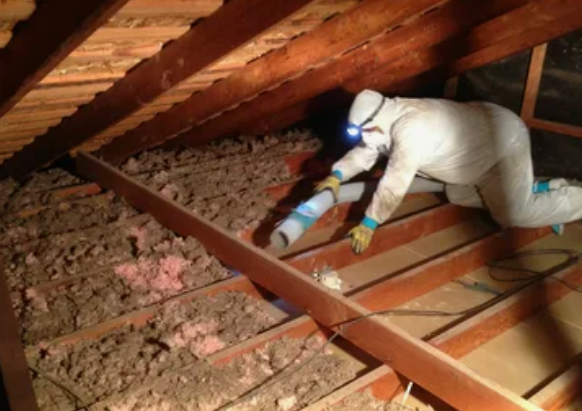
Step 2: Understand the Process
Knowing what to expect helps ease stress and ensures you’re ready for each phase. Here’s a quick breakdown of what professionals typically do during insulation removal:
- Inspect the existing insulation and attic/ wall structure.
- Use commercial vacuums or extraction tools to remove the material safely.
- Bag and dispose of old insulation according to local environmental regulations.
- Sanitize or treat the space if contamination (e.g., mold or pests) is found.
Read the area for re-insulation using materials such as platinum spray foam, if that is your next action.
Step 3: Clear the Work Area
Access points—such as attics, basements, or crawl spaces—must be clutter-free to facilitate easier access for technicians. Take away boxes, furniture, or storage materials close to the area of insulation. When access is through your residence (such as a hallway or garage), remove obstructions to avoid the possibility of tripping hazards or damage to your property.
Tip: Label or photograph where things go if you’re moving large quantities of stored items.
Step 4: Protect Your Belongings
While professionals use containment methods like plastic sheeting and HEPA vacuums, it’s a good idea to take extra precautions:
- Cover furniture and electronics near work zones with tarps or plastic covers.
- Remove valuable or delicate items from adjacent rooms.
- Close air vents or ducts nearby to prevent dust circulation.
Even with the cleanest crews, insulation removal can kick up debris. Preparing your home allows for faster clean-up and your peace of mind.
Step 5: Prepare for Noise and Temporary Discomfort
Insulation removal means machinery, movement, and possibly significant noise. If you are at home during work hours, have young children, or pets, prepare ahead:
- Plan on working offsite during the removal phase.
- Relocate pets to a quiet room or plan on pet daycare for the day.
- Notify family members of the schedule so they can prepare.
The procedure doesn’t usually take a day or two, but understanding that it can interrupt your daily routine helps you better plan.
Step 6: Ventilation is Key
While the process is normally safe, it’s a good idea to promote good airflow during and after insulation removal—particularly if you’re working with old fiberglass, cellulose, or dirty materials. Contractors use air scrubbers and exhaust fans, but you can help by:
- Opening windows if it’s weather-permitting.
- Activating exhaust fans in adjacent bathrooms or kitchens.
- Operating an air purifier in surrounding rooms.
When putting in new insulation such as platinum spray foam, proper ventilation is also crucial to allow adequate curing and remove any remaining odors.
Step 7: Preparing for Post-Removal Inspection
Once the insulation has been removed, the professionals may perform a follow-up inspection. This step is crucial for:
- Determining evidence of water damage or mold.
- Detecting air leaks or thermal bridging.
- Providing recommendations for further action, such as air sealing or re-insulation.
If you’re choosing platinum spray foam, now’s the ideal moment to inquire about application thickness, coverage, and drying time. Platinum spray foam provides greater thermal resistance (R-value), air sealing, and moisture control—recommending it as a top-notch upgrade for homeowners renovating their insulation system.
Step 8: Plan Your Re-Insulation Smartly
As tempting as it is to get new insulation in as quickly as possible, you may find it helpful to pause for a moment to consider:
- Is now the time to replace your HVAC system?
- Do you need to caulk any vents or gaps in air first?
- Do you have any electrical or plumbing work that needs upgrading?
After all other preparation is done, install your new insulation. Platinum spray foam is the choice for a tight thermal envelope, less noise, and long-term energy efficiency.
Final Thoughts
Carefully preparing to remove insulation can be the difference between a world of trouble and a world of ease in how effectively and safely the process goes. From clear-out space to airing out your home and getting a professional crew on board, these are the steps to take you there. With the old insulation removed, you’ll be well-placed to improve the comfort and energy efficiency of your home—especially with a cutting-edge product like platinum spray foam.